

How To Connect QNAP NAS To VMware ESXi - NFS Vs iSCSI
OLEKSANDR SYZOVShare
How To Connect QNAP NAS To VMware ESXi - NFS Vs iSCSI
Free Professional Consultation on server equipment.
Phone: +38 (067) 819-38-38 / E-mail: server@systemsolutions.com.ua
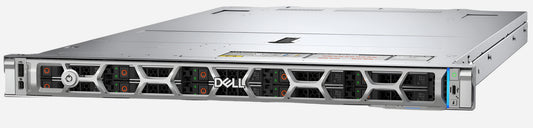
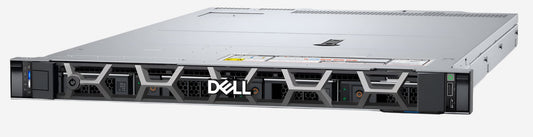
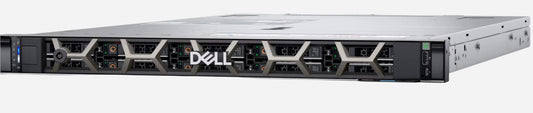
DELL PowerEdge R760 Server configurator
Connecting your QNAP NAS to a VMware ESXi server provides a centralized storage solution for your virtual machines. The two primary protocols for this connection are NFS (Network File System) and iSCSI (Internet Small Computer System Interface) . The best choice for you will depend on your technical expertise, performance requirements, and security needs.
Here's a breakdown of NFS vs. iSCSI and how to set them up with your QNAP NAS and ESXi.
NFS vs. iSCSI: Key Differences
|
Feature |
NFS (Network File System) |
iSCSI (Internet Small Computer System Interface) |
|
Protocol Level |
File-level: ESXi sees a shared folder (NFS export) and can read/write files to it. This is simpler to manage. |
Block-level: ESXi sees a raw block device (a LUN) that it can format with its own file system (VMFS). This is more like having a local hard drive. |
|
Ease of Setup |
Easier: Generally simpler and quicker to configure. |
More Complex: Requires more steps, including creating targets, LUNs, and configuring initiators. |
|
Performance |
Good: Excellent for general use and can be very fast with proper network configuration (eg, 10GbE). |
Potentially Higher: Can offer better performance for random read/write operations, especially with a dedicated network. |
|
Flexibility |
Less Flexible: You are limited to the features of the NFS share. |
More Flexible: Offers more configuration options, including multipathing for redundancy and load balancing. |
|
Security |
Basic: Relies on network-level security (eg, dedicated VLAN) and host-based permissions. NFSv4.1 adds more security features. |
More Secure: Includes built-in authentication (CHAP) and data encryption options. |
How to Connect via NFS
NFS is a straightforward way to create a datastore on your ESXi host.
On your QNAP NAS:
-
Enable NFS Service: Log in to your QNAP's web interface (QTS), go to Control Panel > Win/Mac/NFS , and enable the NFS service. It's recommended to use NFSv4 or newer if your ESXi version supports it.
-
Create a Shared Folder: Go to Control Panel > Privilege > Shared Folders and create a new folder that will be used for your datastore.
-
Configure NFS Permissions: Edit the permissions of the shared folder and go to the NFS Host Access tab. 1 Add the IP address or subnet of your ESXi host(s) and give them read/write access.
On your VMware ESXi Host:
-
Add a New Datastore: In the vSphere Client, navigate to your ESXi host, go to the Datastores tab, and select New Datastore .
-
Select NFS: Choose NFS as the datastore type.
-
Provide Details:
-
Give the datastore a name.
-
Enter the IP address of your QNAP NAS.
-
Enter the path to the shared folder you created (eg,
/your_shared_folder_name).
-
-
Complete the Wizard: Follow the prompts to finish adding the NFS datastore.
How to Connect via iSCSI
iSCSI provides block-level storage, which can offer better performance for I/O-intensive applications. 2
On your QNAP NAS:
-
Create an iSCSI Target and LUN:
-
Log in to your QNAP's web interface and open iSCSI & Fiber Channel .
-
Create a new iSCSI Target . You can optionally enable CHAP authentication for security.
-
Create a LUN (Logical Unit Number) and map it to the target you just created. The LUN is the block of storage that will be presented to your ESXi host. You can choose between "thin" and "thick" provisioning.
-
On your VMware ESXi Host:
-
Configure the iSCSI Initiator:
-
In the vSphere Client, go to your ESXi host, then Configure > Storage Adapters .
-
Click the iSCSI Software Adapter (you may need to add it first).
-
Under Dynamic Discovery , add the IP address of your QNAP NAS.
-
If you enabled CHAP on your QNAP, configure the CHAP credentials here.
-
-
Rescan for Storage: After configuring the initiator, rescan the storage adapter. The iSCSI LUN from your QNAP should now be visible as a device.
-
Create a New Datastore:
-
Go to the Datastores tab and select New Datastore .
-
Choose VMFS as the datastore type.
-
Select the iSCSI LUN you just added.
-
Follow the wizard to format the LUN with the VMFS file system and create the datastore.
-
Which One Should You Choose?
-
For simplicity and general use: NFS is often the easiest and fastest way to get started. It's a great choice for home labs and small to medium-sized businesses.
-
For performance and advanced features: If you need the best possible performance for demanding applications (like databases) or want to take advantage of features like multipathing, iSCSI is the better option. However, it requires a more careful and dedicated network setup.
The best prices for official DELL PowerEdge R760 servers in Ukraine.
Free consultation by phone +38 (067) 819 38 38
Available server models from the warehouse in Kyiv:
Server Dell PowerEdge R760 - Intel Xeon Silver 4510 2.4-4.1Ghz 12 Cores
Server Dell PowerEdge R760 - Intel Xeon Silver 4514Y 2.0-3.4Ghz 16 Cores
Server Dell PowerEdge R760 - Intel Xeon Gold 6526Y 2.8-3.9Ghz 16 Cores
Server Dell PowerEdge R760 - Intel Xeon Gold 5420+ 2.0-4.1Ghz 28 Cores