
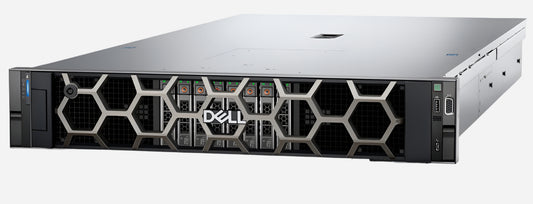

Updating Firmware on Dell PowerEdge R760 / R660 Servers
OLEKSANDR SYZOVShare
Updating Firmware on Dell PowerEdge R760 / R660 Servers.
Updating firmware on a Dell PowerEdge R760 and also Dell PowerEdge R660 server is a critical maintenance task to ensure optimal performance, stability, and security. There are several methods you can use, and while I cannot directly provide screenshots in this text-based format, I can give you a detailed, step-by-step guide for the most common and recommended methods, along with descriptions of what you would see on screen.
The primary methods for updating firmware on a Dell PowerEdge R760 are:
- Using the Integrated Dell Remote Access Controller (iDRAC9) Web Interface: This is often the easiest and most preferred method as it can be done remotely without needing direct access to the server or affecting the operating system.
- Using the Dell Lifecycle Controller (via F10 during boot): This method is embedded in the server's firmware and is excellent for updating multiple components at once, especially if you want to use a local source (USB, mounted ISO).
- Using the Dell Server Update Utility (SUU): This is a local, one-to-one tool that can be run from within an operating system (Windows Server or Linux) or from within the Lifecycle Controller.
- Using Dell Update Packages (DUPs) directly from the OS: This is for updating individual components.
For the Dell PowerEdge R760, which is a newer generation server, the iDRAC9 and Lifecycle Controller methods are highly recommended.
Method 1: Updating Firmware using iDRAC9 Web Interface (Recommended)
This method allows you to update individual or multiple firmware components remotely.
Prerequisites:
- iDRAC IP Address: You need to know the IP address of your iDRAC9.
- iDRAC Credentials: Username and password for logging into iDRAC.
- Firmware Files: Download the necessary firmware update files (typically .DUP or .EXE for Windows x64 DUPs) for your Dell PowerEdge R760 from the official Dell Support website (dell.com/support). Enter your server's Service Tag to get the most accurate downloads.
Steps:
- Download Firmware Files:
- Go to dell.com/support.
- Enter the Service Tag of your PowerEdge R760 or search for "PowerEdge R760".
- Navigate to the "Drivers & Downloads" section.
- Filter by "Category" (e.g., "BIOS," "iDRAC," "Storage Controller," "Network," etc.) and "Operating System" (though many firmware updates are OS-independent, selecting your OS helps with drivers).
- Download the .DUP or .EXE files for the firmware you want to update. Save them to a local machine from which you'll access the iDRAC.
What you'll see: A list of drivers and firmware, with download links. You'll click "Download" next to each relevant update.
- Log in to iDRAC9:
- Open a web browser and enter the iDRAC IP address.
- Enter your iDRAC username and password to log in.
What you'll see: The iDRAC login page, then the iDRAC dashboard (overview page).
- Navigate to System Update:
- In the iDRAC web interface, navigate to Maintenance > System Update.
What you'll see: A page with options for "Manual Update," "Automatic Update," and "Job Queue."
- Perform Manual Update:
- On the Manual Update tab, select Local as the "Location Type."
- Click the Choose File button.
- Browse to and select one of the downloaded firmware .DUP or .EXE files from your local machine.
- Click Upload.
What you'll see: A file browser window to select the file. After selecting and uploading, a progress bar will appear. Once uploaded, the "Update Details" section will display information about the uploaded firmware, including the device name, current version, and available version. You'll see a green checkmark or a "plus" icon if the file is valid.
- Add to Job Queue:
- After the upload is complete, select the checkbox next to the firmware you want to install in the "Update Details" section.
- Depending on the firmware, you'll have options:
- Install: For updates that do not require a host system reboot (e.g., some iDRAC firmware updates).
- Install and Reboot: For updates that require an immediate host system reboot.
- Install Next Reboot: For updates that will be applied during the next planned server reboot.
- Click the appropriate install option.
What you'll see: A message like "Updating Job Queue" will appear.
- Monitor Job Queue:
- Click on Job Queue to monitor the progress of the firmware update.
What you'll see: A list of pending and completed jobs. You can refresh this page to see the status (e.g., "Scheduled," "Running," "Completed," "Failed").
- Repeat for Other Firmware (if necessary):
- Repeat steps 4-6 for any other firmware files you need to update. iDRAC can queue multiple updates.
Important Notes for iDRAC Updates:
- Order of Updates: While iDRAC often handles dependencies, it's generally a good practice to update iDRAC firmware itself first, then BIOS, and then other components like RAID controllers, network adapters, etc.
- Server Downtime: If an update requires a server reboot, plan for downtime.
- HTTPS (Online Updates): For iDRAC9, you can also update directly from Dell's website via HTTPS if your iDRAC has internet access. Go to Maintenance > System Update, select HTTPS as the "Location Type," enter downloads.dell.com as the "HTTPS Address," and click "Check for Update." This will show you a list of available updates directly from Dell.
Method 2: Updating Firmware using Dell Lifecycle Controller (via F10)
This method is ideal for updating multiple components in a single pass using a local source (USB drive or mounted ISO) or by connecting to Dell's online repository.
Prerequisites:
- Firmware Files:
- For Local Drive (USB/ISO): Download the individual .DUP files for your PowerEdge R760 from Dell Support. For a USB drive, it should be formatted as FAT32. For an ISO, you can create a bootable ISO containing all DUPs using Dell Repository Manager (DRM) for a more comprehensive update.
- For Dell Website: Ensure your server's iDRAC has network connectivity and can access the internet (or Dell's update servers if behind a proxy).
Steps (Using Dell Website - Easiest for comprehensive updates):
- Boot into Lifecycle Controller:
- Restart your Dell PowerEdge R760.
- During POST (Power-On Self-Test), repeatedly press F10 when prompted to enter the Lifecycle Controller.
What you'll see: Dell splash screen, then options to press F2 (System Setup), F10 (Lifecycle Controller), F11 (Boot Manager), etc. You'll see the Lifecycle Controller loading screen.
- Navigate to Firmware Update:
- From the Lifecycle Controller main menu, select Firmware Update.
- Then, select Launch Firmware Update.
What you'll see: The main menu of the Lifecycle Controller, then the "Firmware Update" options.
- Select Update Repository:
- Choose Dell Website (HTTPS) as your "Update Repository" source.
- Click Next.
What you'll see: A screen with options for "Local Drive (CD/DVD/USB)," "Network Share (CIFS, NFS, HTTP)," and "Dell Website (HTTPS)."
- Configure Proxy (if needed):
- If your network requires a proxy to access the internet, configure the proxy settings on this screen.
- Click Next.
What you'll see: A screen to enter proxy server details. You can also test the network connection.
- Scan for Updates:
- The Lifecycle Controller will now connect to the Dell website and scan for available firmware updates for your server. This may take some time.
What you'll see: A progress indicator as it checks the online catalog.
- Select Updates and Apply:
- Once the scan is complete, a list of available firmware updates will be displayed. You'll see the current version and the new version for each component (BIOS, iDRAC, RAID controller, network adapters, etc.).
- Select the updates you wish to install by checking the boxes next to them. Often, you can select "All" or apply all recommended updates.
- Review any warning messages (e.g., TPM/BitLocker implications if updating BIOS).
- Click Apply.
What you'll see: A list of components with their versions, checkboxes to select, and a summary of selected updates. A confirmation screen will appear before the update starts.
- Installation Process:
- The Lifecycle Controller will download and install the selected update packages. This process may involve multiple reboots of the server. Do NOT interrupt the process.
What you'll see: Progress bars for download and installation, messages indicating reboots. The server will restart automatically as needed.
- Completion:
- Once all updates are installed and the server has rebooted, you can exit the Lifecycle Controller and boot into your operating system.
Method 3: Using Dell Server Update Utility (SUU)
SUU is a comprehensive tool that can be used from within an operating system or via the Lifecycle Controller.
Prerequisites:
- Dell Server Update Utility ISO: Download the latest SUU ISO for your operating system (if running from OS) or for general use (if running from Lifecycle Controller) from dell.com/support. Search for "Dell Server Update Utility" or "SUU" on the R760 support page.
Steps (Running from a Windows Server OS on the R760):
- Download SUU ISO:
- Download the appropriate SUU ISO file from Dell Support.
- Mount the ISO:
- In Windows Server, you can simply right-click the ISO file and select "Mount" or use a virtual drive mounting software.
- Launch SUU:
- Browse to the mounted ISO drive.
- Double-click suulauncher.exe.
What you'll see: The SUU application interface will launch. It will perform an inventory of your server's current firmware.
- Review and Apply Updates:
- The SUU interface will display a "Compliance Report" showing the current firmware versions and the available updates from the SUU ISO.
- Select the components you wish to update (or select all applicable updates).
- Click Apply.
What you'll see: A detailed report of current and available versions, checkboxes for selection, and an "Apply" button. Progress bars will indicate the installation process.
Steps (Running from Lifecycle Controller using SUU ISO):
- Download SUU ISO:
- Download the appropriate SUU ISO file from Dell Support.
- Make Bootable Media or Mount Virtually:
- Burn the ISO to a DVD.
- Create a bootable USB drive from the ISO.
- Mount the ISO virtually through iDRAC's Virtual Media feature.
- Boot into Lifecycle Controller (F10):
- Restart the server and press F10 during POST.
- Navigate to Platform Update:
- From the Lifecycle Controller main menu, select Platform Update.
- Select Local Drive:
- Choose Local Drive (CD/DVD/USB) as the "Update Repository" source.
- Insert the SUU DVD, connect the USB, or ensure the ISO is virtually mounted.
- Click Next.
What you'll see: Options for update repository sources.
- Scan and Apply Updates:
- The Lifecycle Controller will scan the SUU media for updates.
- A list of available updates will be presented. Select the desired updates and click Apply.
What you'll see: A list of updates with current and available versions. Progress indicators during the update process.
General Tips for Firmware Updates:
- Read Release Notes: Always review the release notes for each firmware update. They contain crucial information about new features, bug fixes, known issues, and any specific installation instructions or dependencies.
- Backup Data: While firmware updates are generally safe, always ensure you have a recent backup of critical data before performing any major system updates.
- Stable Power: Ensure the server has a stable power source (e.g., connected to a UPS) to prevent interruptions during the update process.
- One Component at a Time (if wary): If you are extremely cautious, you can update one component at a time and reboot if required, then move to the next. However, using Lifecycle Controller or SUU for a full update typically handles dependencies well.
- iDRAC Firmware First: If you are updating multiple components, it's generally recommended to update the iDRAC firmware first, as it often provides improvements to the update process itself.
By following these detailed steps, you should be able to successfully update the firmware on your Dell PowerEdge R760 server. Remember to adapt the steps slightly based on the specific firmware files and your chosen update method.
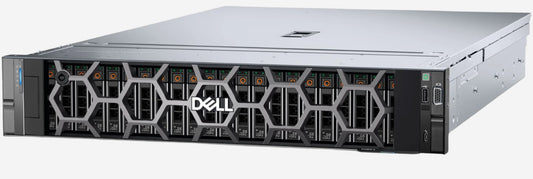
Найкращі ціни на офіційні сервери DELL PowerEdge R760 в Україні.
Безкоштовна консультація по телефону +38 (067) 819 38 38
Доступні моделі серверів зі складу у Києві:
Сервер Dell PowerEdge R760 - Intel Xeon Silver 4510 2.4-4.1Ghz 12 Cores
Сервер Dell PowerEdge R760 - Intel Xeon Silver 4514Y 2.0-3.4Ghz 16 Cores
Сервер Dell PowerEdge R760 - Intel Xeon Gold 6526Y 2.8-3.9Ghz 16 Cores
Сервер Dell PowerEdge R760 - Intel Xeon Gold 5420+ 2.0-4.1Ghz 28 Cores