How to Install VMware ESXi 8 and Veeam Backup
OLEKSANDR SYZOVShare
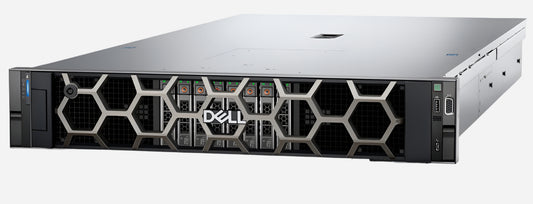
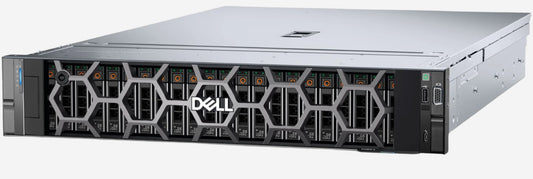
How to Install VMware ESXi 8 and Veeam Backup on Dell PowerEdge R760 server with Dell PowerVault ME5024 Storage.
Безкоштовна Професійна Консультація з серверного обладнання.
Тел: +38 (067) 819-38-38 / E-mail: server@systemsolutions.com.ua
Конфигуратор Сервера DELL PowerEdge R760
Installing VMware ESXi 8 on a Dell PowerEdge R760 is a common and supported scenario. Here's a comprehensive guide:
1. Prerequisites and Compatibility:
- Dell Customized ESXi Image: Always use the Dell customized ESXi 8 image for your PowerEdge R760. This image includes necessary drivers and optimizations specifically for Dell hardware, preventing potential compatibility issues. You can download it from the Dell Support website (search for your R760 service tag or model and look under "Drivers & Downloads" for "Enterprise Solutions" or "Hypervisors").
- System Compatibility: The Dell PowerEdge R760 is compatible with VMware ESXi 8.0, 8.0 U1, 8.0 U2, and 8.0 U3 (and potentially later versions). You can verify this on Dell's official compatibility matrix or VMware's Hardware Compatibility List (HCL).
- Minimum Requirements: Ensure your R760 meets the minimum hardware requirements for ESXi 8, including RAM (8GB minimum, but more is highly recommended for any practical use) and CPU.
- Boot Device: VMware no longer recommends SD/USB devices for ESXi 8 boot devices. Consider using an internal hard drive, SSD, or a Dell BOSS-S1/BOSS-N1 card for reliable booting.
- iDRAC Access: Access to the iDRAC (Integrated Dell Remote Access Controller) Web UI is highly recommended for a smooth installation, as it allows you to remotely mount the ISO and manage the server.
2. Prepare for Installation:
- Download the Dell Customized ESXi 8 ISO: As mentioned above, get the correct ISO from Dell's support site.
- Update Firmware (Recommended): Before installing ESXi, it's always a good practice to update your PowerEdge R760's firmware (BIOS, iDRAC, PERC controller, network adapters, etc.) to the latest versions. This helps ensure optimal performance and stability with ESXi. You can do this through the iDRAC or by creating a bootable firmware update media.
- Configure RAID (if applicable): If you plan to install ESXi on a RAID array (e.g., using a PERC controller), configure the RAID array in the server's BIOS or PERC controller utility before starting the ESXi installation.
- Network Configuration (Pre-planning): Decide if you'll use DHCP or a static IP address for the ESXi management network. Have the necessary IP address, subnet mask, gateway, and DNS server information ready.
3. Installation Steps (Using iDRAC Virtual Media - Recommended):
- Access iDRAC: Open a web browser and navigate to the IP address of your PowerEdge R760's iDRAC. Log in with your credentials.
- Launch Virtual Console: From the iDRAC Web UI, launch the Virtual Console (usually Java, HTML5, or ActiveX based).
- Connect Virtual Media:
- Within the Virtual Console, select "Virtual Media" (or similar).
- Choose "Connect Virtual Media" or "Map CD/DVD."
- Browse to your downloaded Dell customized ESXi 8 ISO file on your local machine.
- Click "Map Device" (or similar) to attach the ISO to the server's virtual optical drive.
- Close the virtual media window.
- Set Boot Device:
- In the Virtual Console, select "Boot" and then "Virtual CD/DVD/ISO."
- Confirm to set the ISO as the one-time boot device.
- Power On/Reboot Server:
- Click "Power" and then "Power On System" (or "Power Cycle System" if it's already on).
- Confirm the action.
- ESXi Installer Boot: The server will boot from the virtual media and begin loading the ESXi installer. This may take a few minutes.
- Follow On-Screen Prompts:
- At the ESXi installer splash screen, press Enter to continue.
- Review the End User License Agreement (EULA) and press F11 to accept and continue.
- The installer will scan for available disks. Select the disk or RAID array where you want to install ESXi and press Enter.
- Choose your keyboard layout and press Enter.
- Enter and confirm a root password for the ESXi host. Press Enter.
- Press F11 to begin the installation. This process will take several minutes.
- Installation Complete & Reboot:
- Once the installation is complete, press Enter to reboot the server.
- Important: Before the server reboots, remember to disconnect the virtual media in iDRAC to prevent the server from booting back into the installer. Go to "Virtual Media" and "Disconnect Virtual Media."
4. Post-Installation Configuration:
- Initial Boot: The server will now boot into your newly installed ESXi 8. This may take a few minutes.
- Access DCUI (Direct Console User Interface): Once ESXi has booted, you'll see the Direct Console User Interface (DCUI) on the server's console (or within the iDRAC Virtual Console).
- Configure Management Network:
- Press F2 to log in to the DCUI. Enter the root password you set during installation.
- Select "Configure Management Network" and press Enter.
- Choose "Network Adapters" to verify the correct adapter for the management network is selected.
- Select "IPv4 Configuration" to set a static IP address, subnet mask, and gateway if you didn't use DHCP.
- Select "DNS Configuration" to enter DNS server IPs and optionally a custom DNS suffix.
- Press Esc to exit the network configuration, and confirm the changes.
- Enable SSH (Optional but Recommended for management):
- From the DCUI, select "Troubleshooting Options" and press Enter.
- Choose "Enable SSH" and press Enter.
- Access ESXi Host via Web Browser:
- Open a web browser on your client machine and enter the IP address of your ESXi host.
- Log in with the root username and the password you set.
- From here, you can manage your ESXi host, create virtual machines, configure storage, etc.
Important Notes:
- Drivers: The Dell customized ESXi image usually contains all necessary drivers for your R760. If you encounter any hardware not being recognized, you might need to find and install specific drivers (known as VIBs) from Dell's support site.
- Security: Always follow best security practices, including using strong passwords, configuring firewalls, and keeping ESXi and its components updated.
- Documentation: Refer to Dell's official documentation for your PowerEdge R760 and VMware's ESXi documentation for in-depth information and troubleshooting.
By following these steps, you should be able to successfully install VMware ESXi 8 on your Dell PowerEdge R760 server.
Найкращі ціни на офіційні сервери DELL PowerEdge R760 в Україні.
Безкоштовна консультація по телефону +38 (067) 819 38 38
Доступні моделі серверів зі складу у Києві:
Сервер Dell PowerEdge R760 - Intel Xeon Silver 4510 2.4-4.1Ghz 12 Cores
Сервер Dell PowerEdge R760 - Intel Xeon Silver 4514Y 2.0-3.4Ghz 16 Cores
Сервер Dell PowerEdge R760 - Intel Xeon Gold 6526Y 2.8-3.9Ghz 16 Cores
Сервер Dell PowerEdge R760 - Intel Xeon Gold 5420+ 2.0-4.1Ghz 28 Cores


